开篇
- 作为树莓派的收藏爱好者,买了Pico开发板和Raspberry 400
- 之前买的3B/3B+已经作为收藏品了,4B偶尔用一下
- Pico不了解想看看
- 也一并买了Raspberry 400
- 前天晚上刚收到树莓派
- Pico带焊接排针的开发板(34.49板+6.5壳)。
- Raspberry 400(480)
清单
- 物品清单
- Mac(PC也可)
- Pico开发板(有排针, ¥35)
- MicroUSB(要可传数据)
- 面包线若干
- 12864oled屏(¥30)
- 软件清单
图
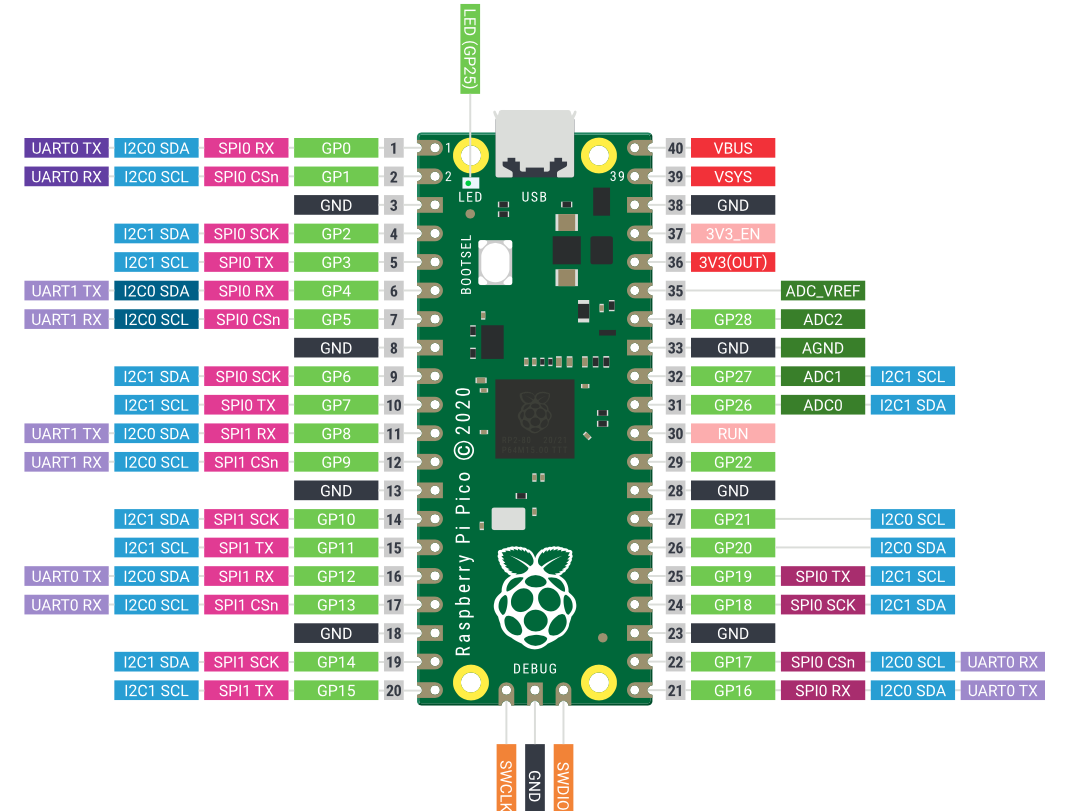
- Pico的GPIO串口图
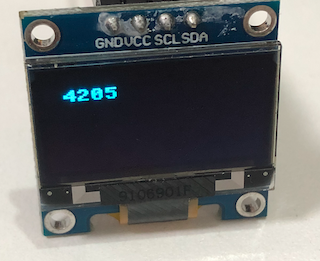
- 12864显示屏
配置Raspberry Pico
- 官方教程
- 软件准备
- 下载并安装Thonny
- 下载 MicroPython UF2 文件
- 硬件连接准备:
- 连好硬件
- 点击Pico开关
- 找到可被系统识别的存储器:RPI-RP2
- 将 MicroPython UF2 文件拷贝到 RPI-RP2内
- RPI-RP2 会消失不见
- 通过 Thonny 连接 Pico
- 工具 -> 设置 -> 解释器
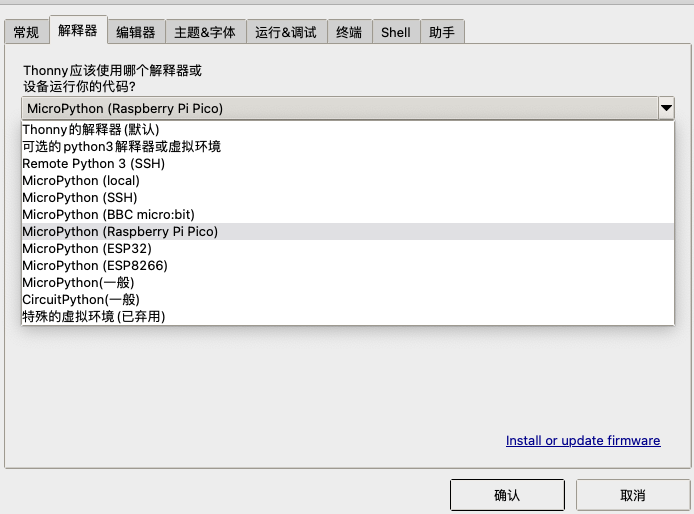
- 工具 -> 设置 -> 解释器
- 代码编写:LED闪烁
- 创建文件 main.py
- 录入代码:
import time from machine import Pin LED = Pin(25, Pin.OUT) if __name__ == "__main__": while True: LED.value(0) time.sleep(0.1) LED.value(1) time.sleep(0.1) - 点击运行当前脚本
- 即可看到LED等在闪烁
- 使用12864oled屏幕
- 下载依赖文件ssd1306.py
- 将ssd1306.py存入到Pico目录下:
- 连接上Pico, 文件另存,选中Pico即可
- 连接排线
- 1286 –> Pico
- GND –> GND
- VCC –> VCC
- SCL –> GPIO 0
- SDA –> GPIO 1
- 编写显示代码: main.py
from machine import SoftI2C, Pin import time from ssd1306 import SSD1306_I2C i2c = SoftI2C(scl=Pin(0), sda=Pin(1)) oled = SSD1306_I2C(128, 64, i2c) i = 0 oled.text("Hello,I am Pico!",10, 10) oled.show() while True: oled.fill(0) oled.show() oled.text("{}".format(i),10, 10) oled.show() i += 1 time.sleep(1) - 点击运行当前脚本
- 即可看到时间跳动
- 软件准备
总体感觉
- 使用起来挺方便
- 很适合中学生去搞DIY